What is serial sectioning and what insights can be gained about a material with it?
DR. BRETSCHNEIDER: In the method known as serial sectioning, we gradually remove layers of material from the sample. After each cut, we take a high-resolution image of the exposed surface. From this, we create a complete 3D reconstruction of the microstructure. This is important for the complex microstructures found in almost all technically used materials. The more sections, the higher the resolution. We typically work with around 100 cutting planes. Depending on the complexity, only 30 or up to 300 planes may be required.
In contrast to many non-destructive methods, serial sectioning provides high-precision information about the smallest microstructures. X-ray inspection or computer tomography, for example, often only offer limited resolution and accuracy. We achieve resolutions ranging from nanometers to millimeters. This enables us to identify the structures (e.g. grain boundaries in a metal) or the distribution of inhomogeneities (e.g. pores or non-metallic inclusions) in the selected material volume. Within the institute, we work closely with colleagues from other fields of technology. We often analyse weld seams and use 3D analysis to provide information on process optimization. Another exciting field of application is additive manufacturing. Here, we also cooperate to investigate the material properties resulting from the process control.
How does the removal of the samples take place and what effort does it take if an average of 100 cuts are required for a 3D structure?
DR. BRETSCHNEIDER: That depends on the required resolution. For the usual sizes, we use several metallographic preparation steps. These include grinding, polishing and etching. At the nanometer level, we can use electron microscopy and FIB (Focused Ion Beam) technology. In this process, the material is removed layer by layer using an ion beam. The layer removal is correspondingly delicate and fine details are visible. The imaging and material analysis are carried out using electron microscopy.
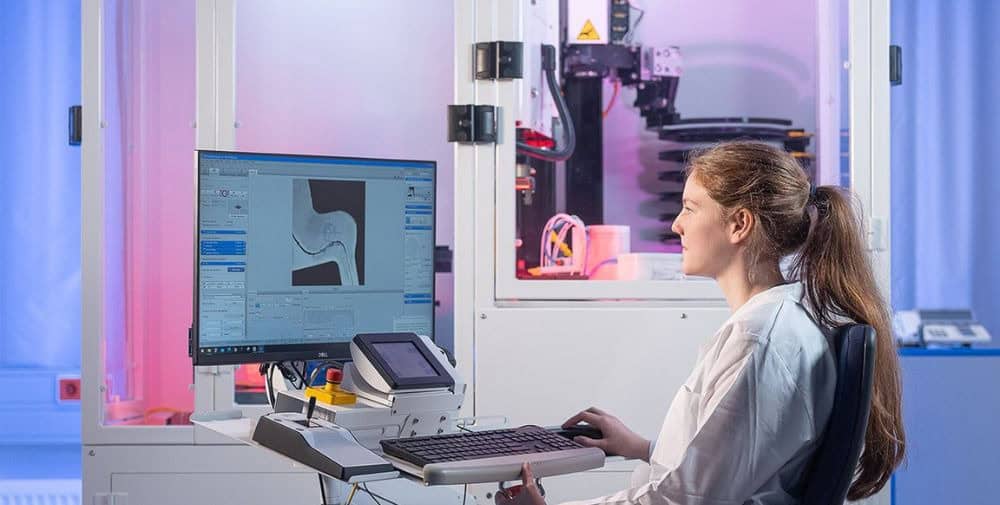
The metallographic process is very time-consuming when carried out manually. Since 2021, however, we have been able to automate it because we use a metallography robot (RoboMet-3D) developed in the USA at the Fraunhofer IWS. Our technician installs the prepared sample in it, sets the parameters appropriately and starts the process. Within the system, the robot processes the sample step by step and places it independently on the built-in light microscope using a robotic arm to generate images. The system repeats this process again and again, even without supervision. As a rule, we let the robot run for the entire working day. Even if this process sounds quite simple, we need experienced technicians to make the robot settings precisely. Without metallographic expertise, the system cannot be used optimally.
What expertise do you mean exactly and how widespread is the use of such a robot?
DR. BRETSCHNEIDER: Factors such as grinding time, the selection of grinding wheels and the correct quantities of polishing agents and chemicals are just a few examples. The metallographic expertise of the researchers in our team forms the indispensable basis. This is because the RoboMet-3D is not a plug-and-play system. The robot does the routine work, but the human has to fully understand the processes and set all the parameters correctly. There are around 20 such robots worldwide, so far almost exclusively in North America. We were the first institution in Europe to use such a system. It was installed in December 2021 and we received extensive training, but it was still necessary to learn a lot in practical use in order to achieve expert handling of the system, as this requires extensive specialist knowledge and time. Our pioneering work in Europe has given us a certain head start. We now use the robot on a daily basis and know how to fine-tune the parameters.
How could this process be developed further?
DR. BRETSCHNEIDER: Every system has its limits. In microscopy, not everything has been exhausted yet. The RoboMet-3D currently only uses a light microscope. We could obtain even finer images if an electron microscope were connected. Hardness measurements, such as the Vickers method, are also not currently integrated. We are already considering combining such methods with the robot in the future.
Mr. Bretschneider, you are now ending your active work at the Fraunhofer IWS. We would like to take this opportunity to thank you on behalf of the entire institute. What will the near future look like for you?
DR. BRETSCHNEIDER: I remain curious and think that the contact with the institute will continue. We certainly won’t be talking about the great potential of automated serial sectioning for the last time. My colleagues in the team will continue to work on the topic with great concentration and expertise. I am pleased to be able to hand the topic over to competent hands.
– – – – – –
Further links
👉 www.iws.fraunhofer.de
Photo: ronaldbonss.com


